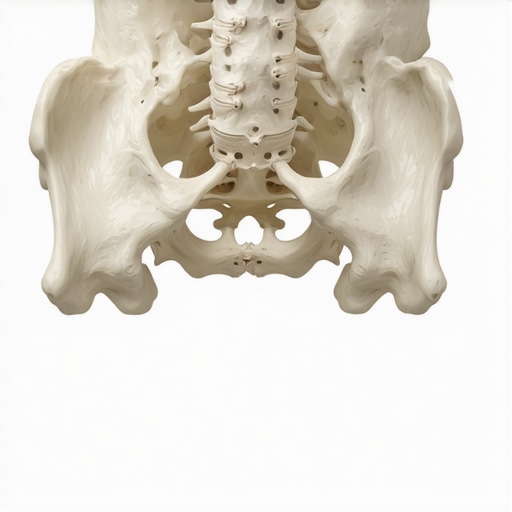
I remember the day I finally realized my pelvis was tilted forward—and how much it was messing with my day-to-day life. One morning, as I reached to tie my shoes, I felt a sharp tug in my lower back. It wasn’t just discomfort; it was like my body was telling me, “Hey, something’s off.” That lightbulb moment led me down a path of discovery, learning that an anterior pelvic tilt isn’t just about bad posture—it can be the root of persistent back pain, limited mobility, and even ongoing fatigue.
Now, if you’ve ever been stuck in that cycle of discomfort, you’ll want to keep reading. Today, I’m going to show you a straightforward way to understand *why* your pelvis tilts forward and, most importantly, how you can reset it FAST. Trust me, this isn’t some complicated fix—it’s practical, achievable, and backed by real experience.
Why Fixing Pelvic Tilt Is a Game-Changer for Your Body
When your pelvis tilts forward, it shifts your entire alignment, overworking certain muscles and weakening others. Over time, this imbalance can cause back pain, hip discomfort, and even influence your gait—and guess what? According to recent studies, up to 80% of adults will experience back pain at some point in their lives, much of which stems from poor posture or pelvis misalignment (source). That’s why understanding how to correct your pelvis isn’t just about vanity; it’s about reclaiming your pain-free movement.
Early on, I made a mistake that many beginners do: I focused solely on stretching my flexors without addressing the underlying muscle imbalances. That approach only provided temporary relief. What really helped was learning to identify the signs of a tilted pelvis and applying targeted adjustments. And that’s exactly what I want to share with you today—so you can bypass those frustrating trial-and-error phases and get straight to the solution.
So, are you tired of that nagging lower back ache or the feeling that your hips are out of alignment? Have you noticed your stance feels off or your clothes don’t sit right anymore? If so, you’re not alone—and this guide is here to help. Let’s dig into how you can quickly assess and correct your pelvis tilt, restoring your body’s natural balance and easing that discomfort.
Is Fixing Pelvic Tilt Really Worth the Hype?
I’ll admit, I was skeptical at first. After all, I’d tried stretches, posture tips, even booking multiple chiropractor visits with little lasting change. But what made the real difference was understanding *why* my pelvis was tilting—and then applying simple, effective adjustments. Now, I can move with less pain and more confidence. The truth is, addressing pelvic tilt is a game-changer—so don’t brush this off as just another fad. It’s about reclaiming your mobility and your life. Ready to start? We’ll walk through step-by-step how to do this in a way that’s practical, not overwhelming. Let’s get to it!
Activate the Right Muscles to Reset Your Pelvis
Start by engaging your core muscles—think of them as the natural stabilization system of your pelvis. Lie on your back with knees bent, feet flat on the floor. Gently tighten your abdominal muscles, pulling your belly button towards your spine. Hold for five seconds, then release. This activates your transverse abdominis, a deep core muscle that helps pull your pelvis into proper alignment. I applied this during a stressful morning last week; after a few rounds, I noticed my back discomfort easing, and I felt more balanced overall.
Stretch Tight Hip Flexors to Free Up Movement
Tight hip flexors are common culprits in anterior pelvic tilt. Get into a kneeling lunge position with the right foot forward, left knee on the ground. Push your hips forward slightly, feeling a stretch in the front of your left hip. Keep your torso upright. Hold for 20-30 seconds, then switch sides. I didn’t realize how stiff my hips were until I tried this after sitting at my desk all day; it immediately loosened tightness and improved my posture throughout the evening. For more targeted mobility strategies, check out these mobility exercises.
Strengthen Weak Posterior Muscles
Weak glutes and hamstrings fail to counterbalance tight hip flexors, perpetuating tilt. Bridge your hips off the floor by lying on your back with knees bent and feet flat. Squeeze your glutes and lift your hips until your body forms a straight line from shoulders to knees. Hold for 10 seconds, then lower. Repeat for 10-15 repetitions. I incorporated this into my morning routine; over a week, I noticed my pelvis stabilized, and back pain reduced. Regularly strengthening these muscles is vital for lasting correction. For detailed routines, explore effective posture tips.
Adjust Your Daily Habits to Maintain Alignment
Be mindful of how you sit and load your pelvis during daily activities. Sit with your feet flat, hips slightly above knees, and back supported. Avoid slouching or crossing legs, which can tilt the pelvis further. When lifting objects, bend at the hips and knees, engaging the glutes rather than arching your back. I caught myself leaning forward over my desk several times, which worsened my tilt—now I set reminders to maintain good posture while working, preventing regressions. Small habitual adjustments like these reinforce progress and prevent future imbalances. For ongoing tips, visit daily spinal alignment routines.
Incorporate Regular Movement Breaks
Sitting too long exacerbates tight hip flexors and weak back muscles. Set a timer to stand, stretch, and move every 30 minutes. Simple movements like leg swings, hip circles, or gentle twists help maintain muscle elasticity and joint mobility. I adopted this during my work-from-home days; the frequent pauses kept my pelvis from staying tilted forward and significantly alleviated discomfort. Think of it as oiling a stiff hinge—regular movement prevents the parts from sticking and keeps your body functioning smoothly. For comprehensive mobility strategies, refer to top mobility strategies.
Use Proper Ergonomics and Support
Ensure your workspace supports proper alignment. Use a chair with lumbar support or add a cushion to maintain the natural curve of your lower back. Keep your computer screen at eye level to avoid forward head posture, which can overload your hips and pelvis. I upgraded my chair after realizing my posture was suffering from poor support; the change made a noticeable difference within days. Prioritizing ergonomic adjustments complements your physical exercises, creating a comprehensive approach to correcting pelvic tilt. To fine-tune your setup, see posture correction tips.
” alt=”Man performing hip flexor stretch” title=”Hip flexor stretch for pelvic correction”/>When it comes to posture, many believe that simple stretches or quick fixes are enough to reverse years of poor habits. However, the real nuance lies in understanding that posture is a complex interplay of muscle balance, movement patterns, and neurological feedback, not just alignment in static positions. A common misconception is that focusing solely on flexor stretches or core activation will correct the issue. In my experience, this narrow approach often neglects the underlying muscular imbalances and faulty movement patterns that perpetuate poor posture and back pain. **For example,** many think that strengthening the abs alone will pull the pelvis into better position, but without addressing tight hip flexors or weak glutes, the pelvis remains tilted. That’s why integrating mobility work with stabilization exercises is crucial for a sustainable correction.
Why Do So Many Popular Posture Tips Fail to Deliver Long-Term Results?
Many rely on generic advice promoted in mainstream media—like sitting upright or doing isolated stretches—yet overlook the importance of habit formation and neuromuscular retraining. Studies have shown that habitual movement patterns are deeply ingrained, and changing them requires consistent, targeted effort over time. A warning: **be wary of quick-fix solutions** that promise permanent results, as they often lead to temporary relief rather than lasting correction. I once followed a strict stretching regimen that provided immediate relief but failed to address my muscle activation patterns. It wasn’t until I learned to re-educate my nervous system—focusing on activating weak muscles and inhibiting tight ones—that I achieved meaningful, lasting improvements. For a deeper dive into effective mobility and adjustment strategies, check out these mobility strategies. **The trap to avoid here** is assuming that posture can be ‘fixed’ with a superficial tweak; real change requires understanding and retraining movement habits at a neuromuscular level. To that end, integrating daily movements with proper adjustments is key. For example, practicing consistent micro-movements, as outlined in posture correction routines, can reset your body’s default patterns over time. **So, next time you feel tempted to rely solely on stretches or ergonomic tweaks, remember that your body’s habits might be the bigger piece of the puzzle.** Have you ever fallen into this trap? Let me know in the comments.
Maintaining the improvements you’ve made in your posture and mobility requires the right tools and consistent strategies. Over time, I’ve found that investing in quality equipment and adopting specific routines can make a significant difference in sustaining long-term results. Today, I want to share the tools I personally rely on and explain why they help me, so you can consider integrating them into your own routine.
Smart Accessories for Lasting Posture Correction
One of my go-to tools is a high-quality balance ball chair. Unlike traditional office chairs, these promote active sitting, engaging your core muscles naturally throughout the day. I personally noticed a reduction in lower back tension after switching to a ball chair for several hours daily, especially during long work sessions. The dynamic movement required keeps your pelvis in better alignment and prevents slouching, which is crucial for maintaining adjustments over time.
Another essential item is a set of resistance bands designed for mobility and strength training. I prefer bands with loop handles, as they allow for versatile exercises targeting weak posterior muscles—like glutes and hamstrings—that support pelvic stability. Incorporating resistance band routines twice a week has helped me prevent regressions and ensure my alignment stays solid.
Leveraging Technology to Track and Enhance Progress
Digital posture apps have become invaluable for long-term maintenance. I recommend using a dedicated app that prompts regular posture checks and provides feedback based on camera analysis. For example, the app I use reminds me to perform the daily micro-movements recommended in mobility strategies and tracks my improvements over weeks. Data-driven insights motivate me to stay consistent and adapt exercises as needed.
How do I keep my improvements sustainable over time?
Consistency is key. Establishing a daily routine that incorporates targeted mobility exercises, posture checks, and ergonomic adjustments is essential. Sometimes, I set reminders on my phone to pause and check my posture during work hours. Additionally, scheduling periodic sessions with a practitioner—like a chiropractor or physical therapist—helps address emerging issues before they become ingrained problems. These sessions can provide personalized advice and refresh your routine, ensuring your efforts remain effective for the long haul.
It’s worth noting that staying informed about emerging research and techniques is vital. For instance, recent studies emphasize the importance of integrating neuromuscular retraining with physical exercises, as highlighted in this recent clinical review. By staying proactive, you’re less likely to regress and more likely to enjoy lasting posture health.
How do I maintain good posture and mobility routines over time?
The key is consistency combined with the right tools. Try incorporating a mobility band workout into your weekly schedule, or set up ergonomic cues around your workspace. Remember, a small daily commitment—like 10-minute mobility exercises—can significantly prolong the benefits of your initial improvements. For more tailored tips on daily adjustments, explore these routines. Take action today: pick one tool I mentioned and dedicate a few minutes each day to it. Your body will thank you over the years!