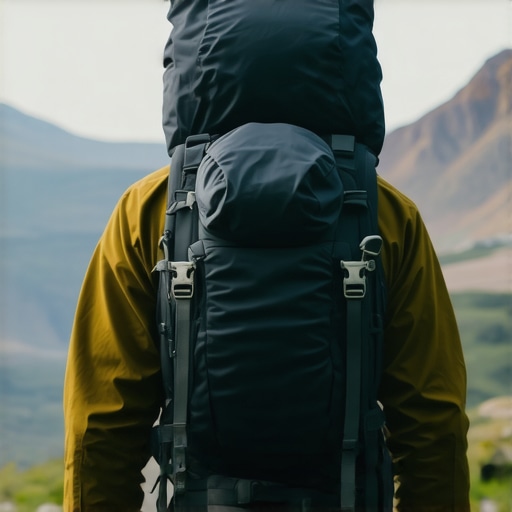
I still remember that afternoon on a steep trail in the Cascades, halfway up a grueling switchback, feeling like my backpack was trying to physically pull my soul out through my shoulder blades. My chest was collapsing, my breathing felt shallow, and my neck was screaming. I looked like a human question mark. I thought the answer was simply to grit my teeth and power through it, but I was wrong. My biggest mistake back then? I would crank my shoulder straps as tight as they would go, thinking that keeping the pack ‘close’ would stabilize it. Instead, I was just pinning my scapulae down and forcing my body into a permanent hunch. It was a recipe for disaster that left me with knots in my traps for weeks. Today, I want to show you exactly how to stop that miserable cycle so you can carry your gear without feeling like you are carrying the weight of the world on your neck.
Stop Letting Your Backpack Win the Tug-of-War
Carrying a heavy load shouldn’t feel like a constant battle against gravity. When your pack is poorly adjusted, it shifts your center of gravity backward, and your body naturally overcompensates by leaning forward. This is often why your chest muscles are pulling your shoulders forward even after you take the bag off. You are essentially training your muscles to stay in a slumped position. The secret is not more strength; it is better mechanics. By unlocking better posture through a few strategic tweaks to how the load sits on your hips, you can stand tall even with thirty pounds on your back. It is about working with your anatomy rather than fighting it. Have you ever finished a long commute or a weekend hike feeling like you’ve aged ten years in just a few hours because of that nagging shoulder burn?
Does expensive gear actually make a difference?
You might be skeptical, thinking you need a five-hundred-dollar mountaineering rig to save your spine. While high-end gear has its perks, most people are simply using their current bags incorrectly. Even the best bag will fail you if the weight isn’t distributed toward your pelvic floor. According to the American Chiropractic Association, a backpack should ideally not exceed 10% to 15% of your total body weight to prevent significant spinal strain. If you are over that limit, your technique has to be flawless. I have seen people with basic school bags move better than pros because they understood how to engage their core. If you feel like you are already ‘stuck’ in that forward-leaning shape, you might need to try a 30-second wall reset to remind your nervous system where ‘upright’ actually is before you even put your straps on. Now, let’s get into the nitty-gritty of how to actually pack and hoist that bag so it feels half as heavy as it really is.
Put Your Hips in Charge of the Heavy Lifting
To fix your posture while carrying a load, you have to think of your body like a skyscraper. A skyscraper doesn’t hang its weight from the top floor; it anchors everything into a solid foundation. Your pelvis is that foundation. If you feel the straps digging into the tops of your shoulders, you are essentially trying to hold up the building from the roof. The first rule of a pain-free carry is to loosen every single strap on the bag before you even put it on. This forces you to rebuild the tension from scratch rather than fighting the ghost of your last hike.
Start from the Bottom Up
Once the bag is on your back, lean forward slightly and find the tops of your hip bones (the iliac crest). The padded part of your hip belt should wrap directly over these bones, not above them. When you cinch that belt, it should feel like a firm hug. I remember helping a friend on a trail near Mt. Hood who was complaining of a burning sensation in her neck. I realized her hip belt was sitting way too high, effectively squeezing her stomach and forcing her to breathe only into her upper chest. We dropped the belt two inches, tightened it, and the relief was instantaneous. Proper belt placement allows for daily adjustments to alleviate back pain and improve posture by transferring the load to your strongest muscles.
The 80/20 Rule for Your Shoulders
Once your hips are locked in, pull the shoulder straps down until they are snug but not restrictive. You want about 80% of the weight on your hips and only 20% on your shoulders. If you over-tighten here, you’ll trigger that classic ‘hunch’ that leads to mid-back knots. The straps should follow the contour of your shoulders like a well-tailored suit, leaving no gap between the padding and your skin. If you see a gap, the bag is pulling you backward; if it’s too tight, it’s crushing your clavicle. 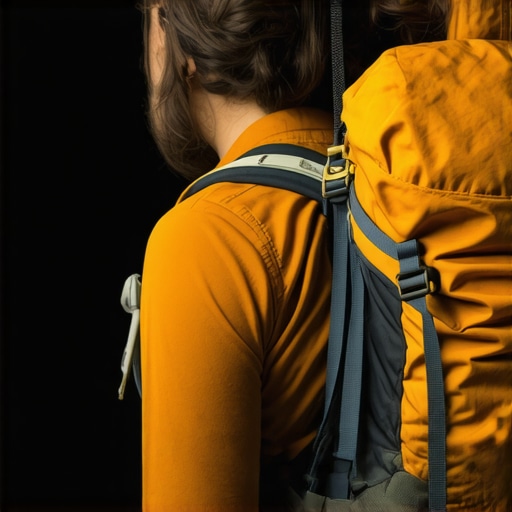
Stop the Sway with Your Load Lifters
Those small straps located near your collarbones that connect the shoulder straps to the top of the pack frame are called load lifters, and they are your best friend for stability. Ideally, these should sit at a 45-degree angle. If they are flat, they aren’t doing anything. If they are vertical, your pack is too long for your torso. By pulling these gently, you bring the weight of the bag closer to your center of gravity, which prevents the ‘tug-of-war’ feeling. This simple tweak is a form of moving without pain because it stops the pack from acting like a pendulum with every step.
Why Your Ribs and Spine Need Space to Move
A common mistake is cranking the sternum strap so tight it pulls the shoulder straps inward toward your neck. This doesn’t just hurt your shoulders; it restricts your ribcage. When your ribs can’t expand, you lose the ability to breathe through your ribs to ease lower back tension. You want the sternum strap to be just tight enough to keep the shoulder straps from sliding off, usually positioned about an inch below your collarbones. Think of it as a stabilizer, not a cinch. If you feel like you are gasping for air on a slight incline, check your chest strap first. Much like learning how to pick up a heavy box without feeling it in your spine, the way you carry a pack is all about managing internal pressure and external leverage. When these four points—hips, shoulders, load lifters, and sternum—are synced, the bag stops being a burden and starts being a part of your body.While those mechanical adjustments are non-negotiable, there is a dangerous myth I see repeated in every hiking forum: just strengthen your core. Most people assume that more planks equals less pain. However, being too rigid is actually a liability. If you are constantly bracing your midsection like you are about to take a punch, you are creating what biomechanists call co-contraction. This stiffness prevents your spine from making the tiny, necessary micro-adjustments required to absorb the impact of your stride. It is one reason why your core strength isnt stopping your back aches. In fact, research published in the Journal of Electromyography and Kinesiology suggests that excessive trunk stiffness can actually increase spinal load during walking, rather than protecting it. You need a responsive core, not a frozen one. 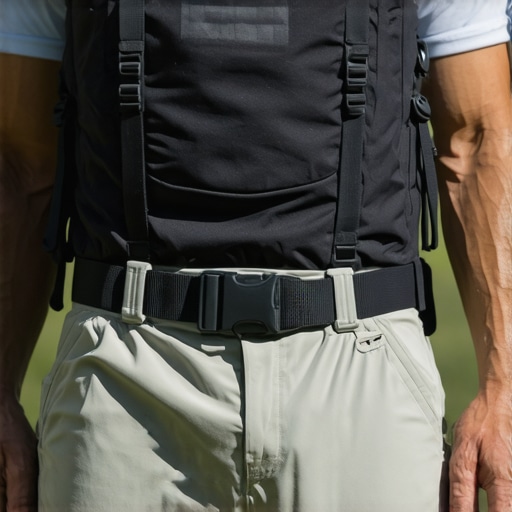
Why do my muscles feel tighter after I take the pack off?
This is a phenomenon I call the phantom load. Your nervous system has spent hours calibrating your balance to account for an extra thirty pounds behind you. When you suddenly remove that weight, your muscles do not instantly get the memo; they stay in that shortened, protective state. This is the real reason your lower back hurts only after you go for a walk or hike. Your body is still fighting a ghost. To counter this, do not just sit down immediately. You need to transition your nervous system. Try the 30-second wall reset right after unbuckling to tell your brain the danger is gone and it is safe to return to neutral. The biggest oops I see advanced hikers make is ignoring their breathing patterns. If you have cinched your straps so tight that you have switched to shallow chest breathing, you are essentially suffocating your lumbar spine from the inside. Proper expert tips for easier movement always emphasize the diaphragm. When you breathe deep into your belly, you create internal pressure that supports your spine like an internal airbag. Have you ever fallen into this trap of over-tightening everything and forgetting to breathe? Let me know in the comments. By focusing on posture correction secrets that transform back pain outcomes, you can ensure that your next adventure does not end with a week of recovery. It is about being supple, not just strong.It is one thing to get your pack dialed in for a single day, but the real challenge is making sure your body does not revert to that ‘question mark’ shape the moment you step off the trail. Consistency is the only way to avoid becoming a statistic in the world of chronic pain. I have found that daily adjustments to alleviate back pain and improve posture are far more effective than a once-a-month deep tissue massage. When I am in the middle of a heavy training block, I treat my mobility work like a job. If I skip it, I pay for it with that frustrating stuck feeling in my mid-back that makes even sleeping uncomfortable. My go-to tool is not a fancy electronic massager; it is a simple lacrosse ball. I use it for a psoas release that finally stops your deep lower back ache after a twenty-mile day. Why the lacrosse ball? Because it is dense enough to reach the deep fascia without deforming like a tennis ball. Dr. Kelly Starrett, a renowned movement expert and author of Becoming a Supple Leopard, emphasizes that restoring ‘sliding surfaces’ between tissues is critical for athletes. If your muscles are ‘glued’ together by fascia, no amount of stretching will fix your posture. 
How can I make these mobility gains actually stick?
The secret is integration. Do not just do ‘posture time’ for ten minutes and then slouch at your desk for eight hours. You have to adjust your routine for lasting relief by making small, frequent checks. This might mean using a chair hack to keep your pelvis neutral or implementing a 10-second posture check every time you reach for your water bottle. We are essentially training the cerebellum to recognize a new ‘normal.’ If you only focus on your back when it hurts, you are already behind the curve. You need to master your mobility before the stiffness sets in. Looking forward, I predict we are going to see a massive shift toward ‘smart packs’ with integrated biofeedback sensors in the next five years. Imagine a hip belt that vibrates when your weight distribution shifts too far to the left, or shoulder straps that alert you when your chest muscles are pulling your shoulders forward. Until that tech is mainstream, the best tool you have is your own awareness. I challenge you to try one specific thing today: the next time you feel that mid-back burn while carrying gear, do not just push through it. Stop, unbuckle, and perform a simple scapular reset. That thirty-second pause could save you three days of recovery later.
What My Hardest Trail Miles Taught Me
The biggest ‘aha’ moment I ever had wasn’t about the bag at all—it was about how my brain perceives load. I realized that my body was often bracing for impact before I even stepped onto the trail, leading to that ‘phantom’ tension that lasts for days. Another critical lesson was that asymmetry is the silent killer. Even a slightly uneven strap can throw your pelvis into a tilt that causes localized burning. Finally, I learned that breathing is the ultimate gear adjustment; if you can’t take a full breath, your bag is too tight. Period.
Tools for a Happy Spine
Keeping your body resilient doesn’t require a trailer full of equipment. I personally swear by a high-density lacrosse ball for localized work; it’s the only way to effectively target the psoas release that finally stops your deep lower back ache. I also recommend keeping a digital copy of the American Chiropractic Association’s backpack safety guidelines to remind yourself of those 15% weight limits. For those who want a structured path, I always point people toward mobility mastery simple exercises to relieve chronic back pain to build that foundational strength. These tools turn recovery from a chore into a lifestyle habit.
#IMAGE_PLACEHOLDER_E#
Ready to Move Without the Ache?
Don’t let the fear of a sore back keep you from the summit or the daily commute. When you learn to adjust your routine for lasting relief, you stop fighting your equipment and start moving with your anatomy. Using these posture correction secrets that transform back pain outcomes, you can ensure that your next adventure is remembered for the views, not the knots in your shoulders. Have you ever felt that strange sensation where your back feels stiffer *after* you take your backpack off? Let me know in the comments below!